Dummy bank tutorial
In this short tutorial we`ll present you to our Dummy-Bank website. This is an example based on the real world, which simulates the process of scheduling an appointment at the bank.
| Provengo Dummy Bank is not a real bank. It is a part of the Provengo tutorials sites and is used to demonstrate a common use-case of the Provengo tool. |
- When completing this tutorial you’ll know
-
-
The basic behavior and main flow of the Dummy Bank app.
-
The different screens appearing based on different user inputs.
-
- This is useful because
-
We will use this real-world example, showing some classic flow, screens and features that are very common in webapps, as a test and specification target in other tutorials.
Main Flow:
In this section, we’ll provide a comprehensive overview of the Provengo Dummy Bank App.
The image below shows the main flow containing the different screens of the Dummy-Bank app.
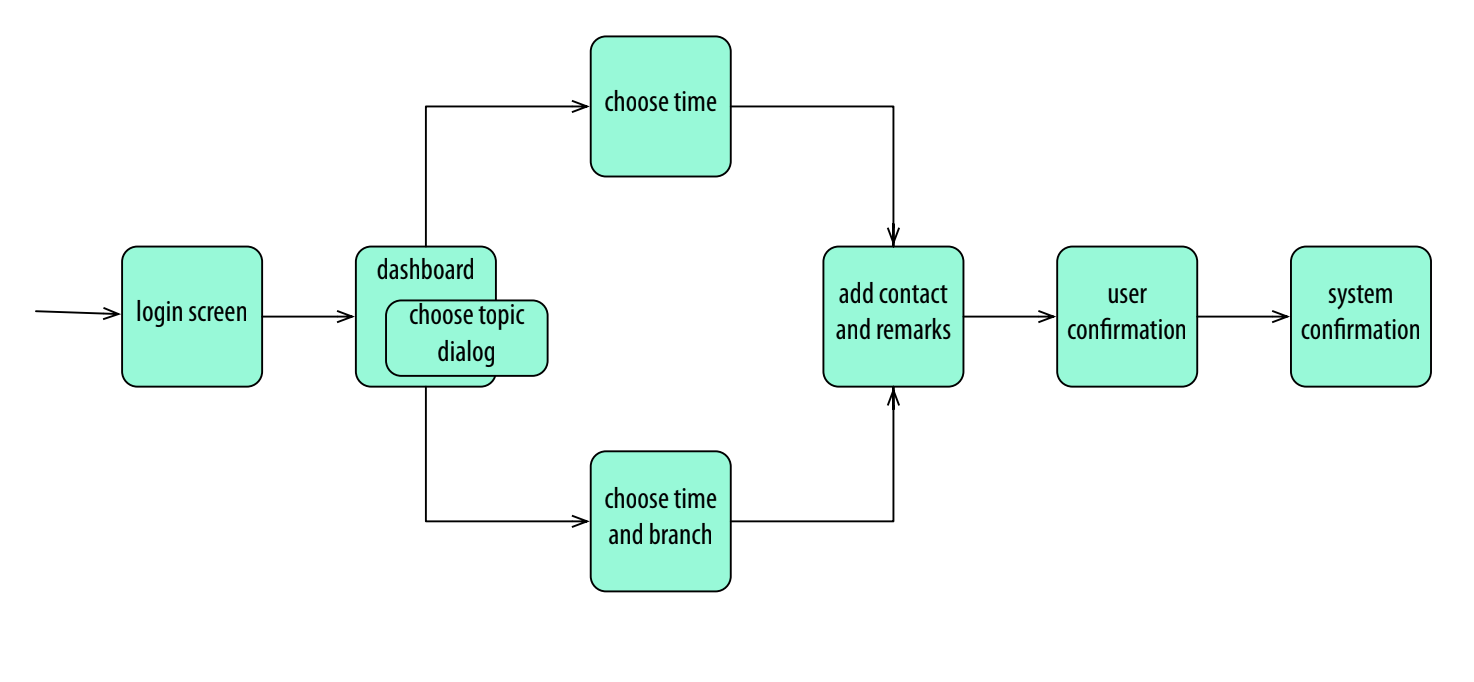
Let’s have a deeper look on each screen.
User Login
This is the first screen of the app. Users need to login with a valid username and password in order to access their dashboard.
-
Credentials to use:
username:teddyBear123
password:Bear123

-
Find the complete list of dummy-users here. This can be useful later on when testing.
-
User enters their credentials and clicks Login.
Dashboard
-
After successful login, the user is redirected to the dashboard where they can start the scheduling process.
Schedule Meetings
-
Find the "Schedule a meeting with" panel on the right hand side of the dashboard.

-
Choose Service and Topic
-
There are 3 service options - Banker, Investment Specialist or a Cashier.
-
User clicks on the desired service button.
-
User is prompted with a dialog box to further choose a topic for their meeting.
-
The topics change according to the selected service.
-
| If the user choose to meet with a cashier, then they also need to select the branch. Otherwise, they only need to set the time. The branch is set automatically to their home branch. |
-
Set Time
- When the selected service is either Banker or Investments Specialist
-
-
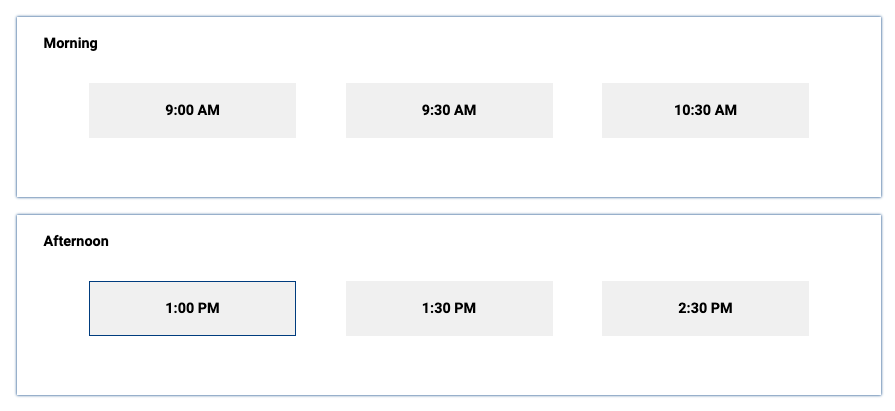
User is redirected to a new screen to set the desired time for the meeting.
-
-
User should select the hour for the meeting by clicking on one of the hour-buttons suggested in the scheduler panels.
-
User clicks on the continue button.
-
Set Time and Branch
- When the selected service is a Cashier
-
-
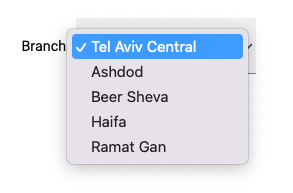
User is redirected to a new screen to set the desired time and branch for the meeting.
-
User should select the hour for the meeting by clicking on one of the hour-buttons suggested in the scheduler panels.
-
User should select their desired branch by clicking on the dropdown menu and then selecting the desired branch.
-
-
User clicks on the continue button.
| Whenever the user decides to click on the back button, all the details he already filled in, should still be available. |
User Contact Information
-
User is redirected to a new screen to fill in his contact info.
-
User should fill in at least one of the following details:
-
valid phone number.
-
valid email address.
-
-
User clicks on the continue button.