Creating Test Suits
- When completing this tutorial
-
You will know how to generate and run test suites using Provengo, how to add Goals and to generate an Ensemble which is an optimized test suite. You will also learn how to define different profiles via the project configuration so you can create multiple test suites based on different areas of interest.
- This is useful because
-
Creating test suites based on your areas of interest and then executing them is one core usage of the tool.
- Code Companion
-
https://github.com/Provengo/TutorialsCodeCompanion/tree/main/3-creating-test-suites
- Pre-Requisites
-
-
Automations tutorial
-
In this tutorial we will learn how to create test suites for the morning routine simulator. We will continue working with the same model as the one developed in the automations tutorial and we’ll be using it’s code companion as a starting point for this one.
You can find a sample solution in the code companion and use it as a reference.
| This tutorial is organized as follows: First we’ll learn how to Generate a random sample of scenarios from the model. Then, we’ll see how to define a basic GOALS object so we can generate an Ensemble file which is basically an optimized test suite. Finally, we’ll explore the project configuration and introduce the concept of generating multiple test-suites based on areas of interest using profiles. |
Recap: Our Model
Let’s recap on the main flow of the model we’ve built in the previous tutorial by visualizing the project’s test space.
Open the solution project using your favorite text editor and make sure the automation-layer.js file is disabled (located under the sepc/disabled folder). Keep the file as we will get back to the automations later on when running (optional section).
Draw the scenarios by typing provengo analyze -f pdf <path-to-project>.
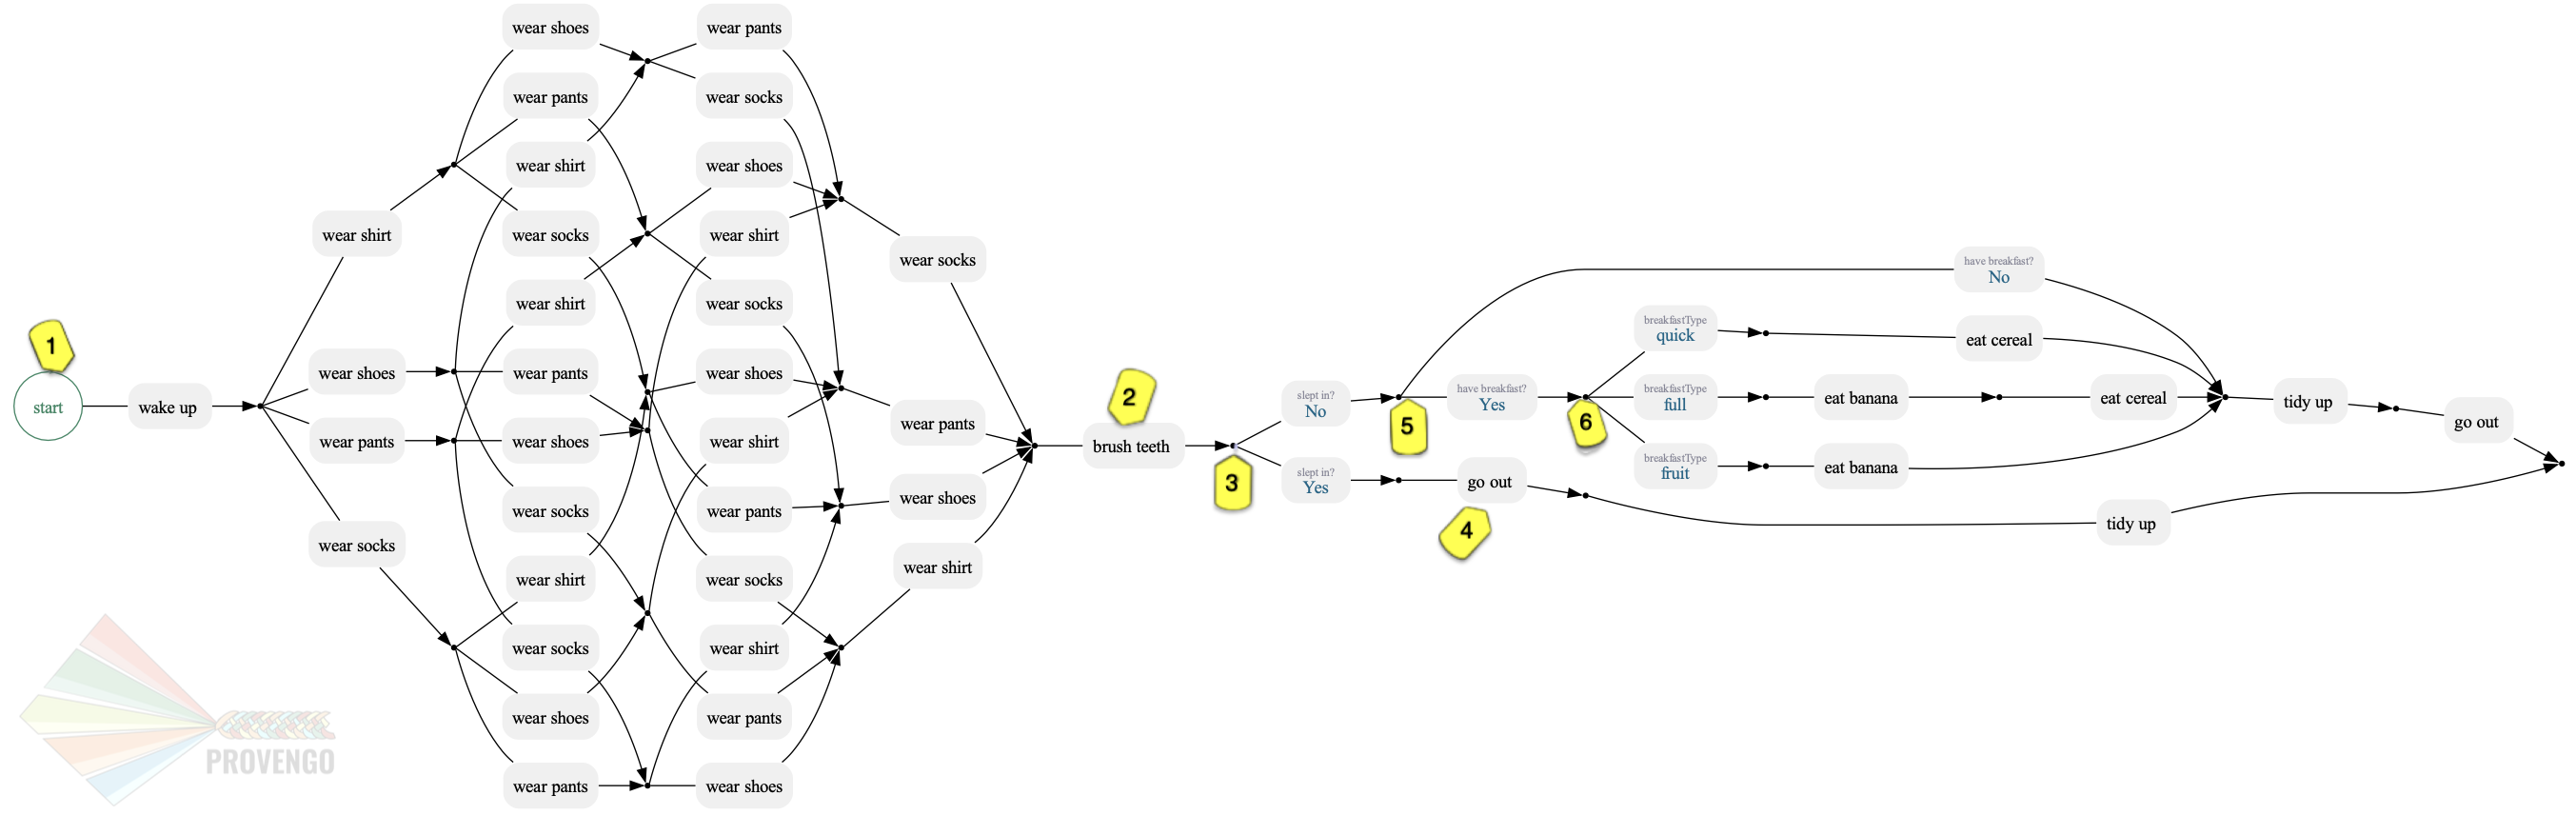
In the drawing above we can see the full scenario space of the morning-routine, that corresponds to the main-story.js file.
Starting with waking up, then getting dressed in all possible ways (marked as 1) and of course, brushing the teeth (marked as 2). Then, we have a split depending on whether we slept in or not (marked as 3). If we did sleep in, then we immediately have to go out and we’ll tidy up on the way (marked as 4). Otherwise, we have time to eat breakfast if we want (marked as 5). The breakfast can be either quick, full or just a fruit (marked as 6). then we tidy up and go out.
You can disable a file by dragging it from spec/js folder into the spec/disabled folder
|
Sampling Scenarios from the Model
In order to generate a test suite from a model, we first need to sample test scenarios from it. To do so, type provengo sample <path-to-project>. provengo will generate a sample file, containing scenarios that the model allows.
As you can see in your console’s output, the system samples a default number of 500 paths. The system will stop sampling after having a default number of 100 consecutive samples that did not discover a new scenario. (You should see that the system wrote about 115-120 samples to file.)
| You can open the samples file in a browser and explore the scenarios it produced - use your favorite JSON viewer. |
To have better control over the sampled scenarios, we can add parameters to the sample command. We can change the amount of sampled scenarios, the maximal length of each scenario, and other parameters. We can also delete all previous samples using the --overwrite option. Read more about the different parameters here.
Let’s create a smaller random test suite by using the size flag
provengo sample --size 3 <path-to-project>.
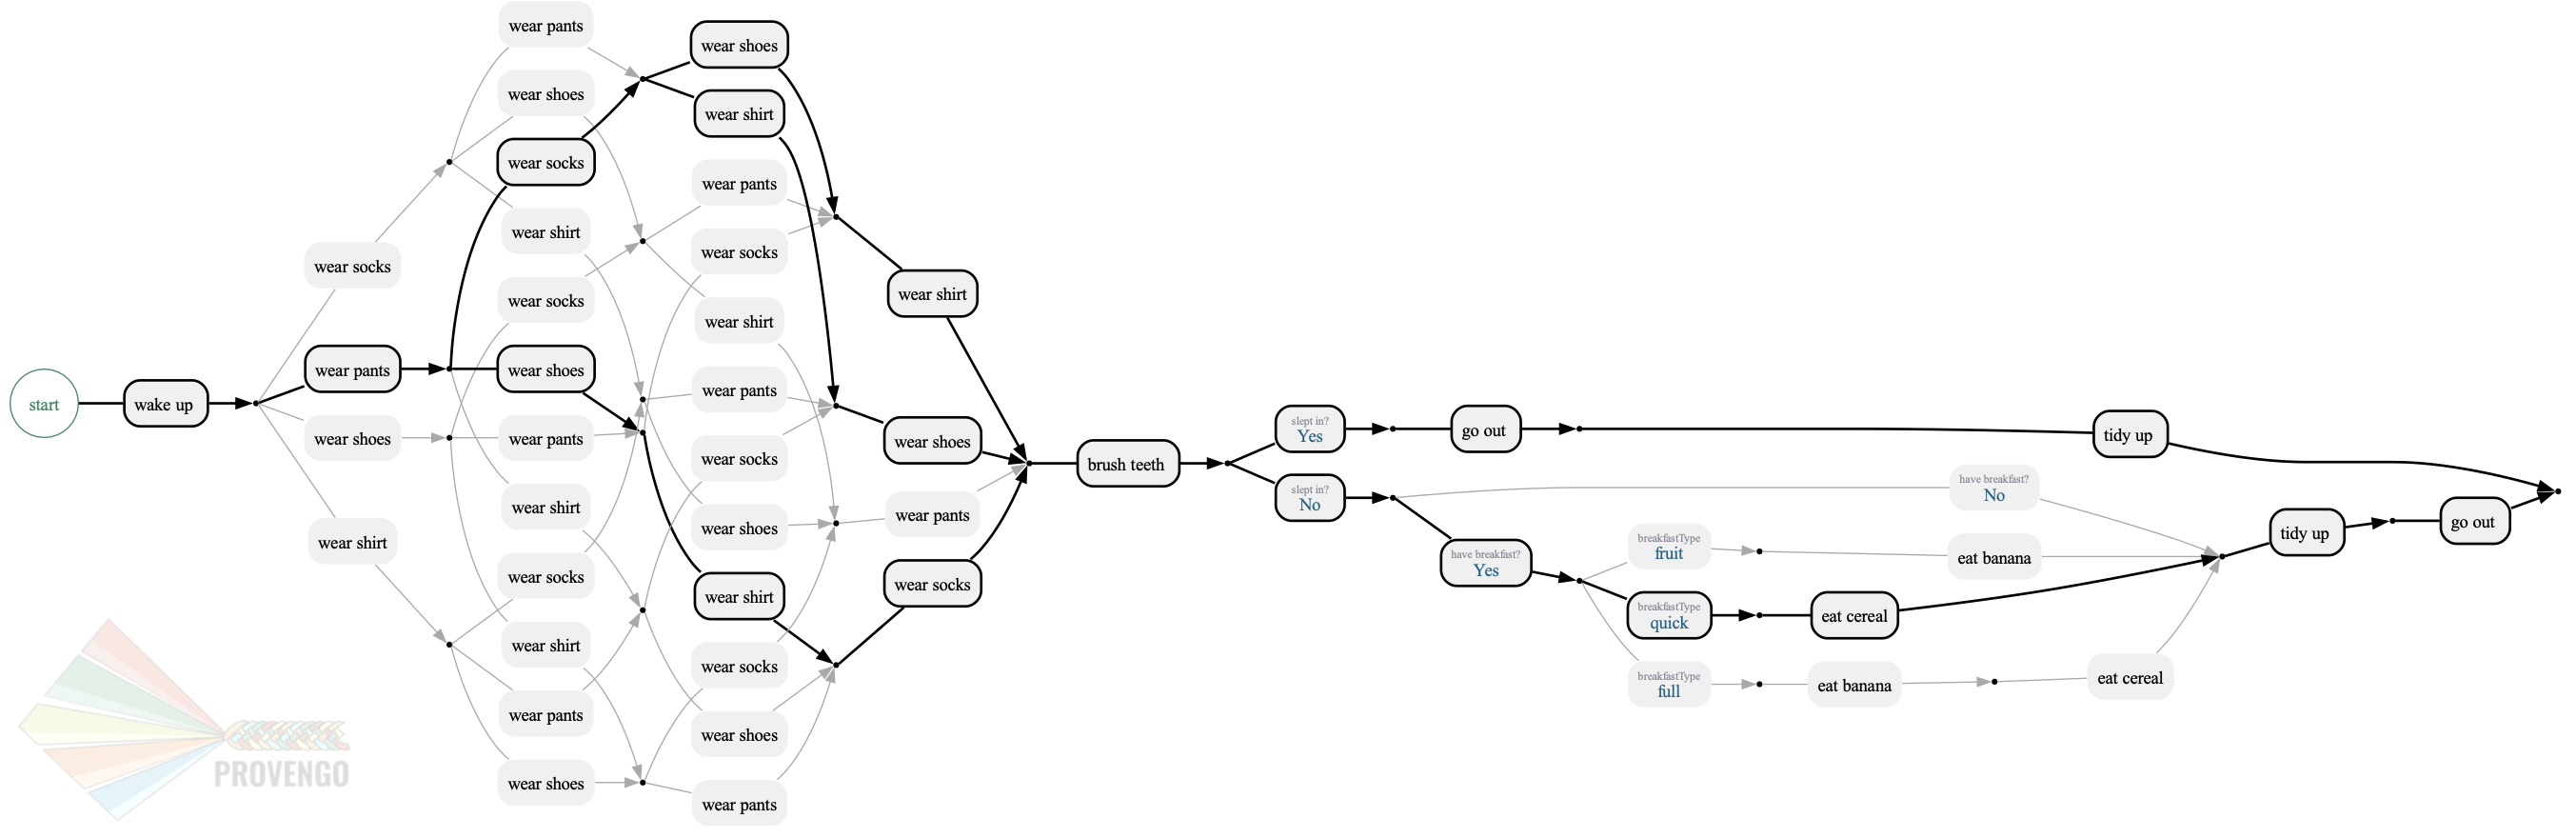
Now let’s redraw the test space, this time highlighting the selected scenarios:
Type provengo analyze -f pdf --highlight <path-to-samples> <path-to-project>
Sampled scenarios are useful for many cases, but they are mostly used for generating optimized test suites, as we’ll see in the following section.
Generate an Optimized Test Suite (Ensemble)
Ensemble is basically an test suite optimized to user-defined needs. Provengo offers very powerful logic for creating optimized test suites, but let’s start with a simple - yet useful! - example: Optimized a test suite such that it covers a given set of goals.
So, let’s assume that it is very crucial to test the scenarios where we eat banana and where we wear shoes. How can we add it to our project then?
The ensemble-code.js file:
We’ll start with defining our goals, then we’ll look into how an ensemble gets it’s rank. In the last step we’ll run the ensemble command and draw it to view the results.
Find the GOALS array inside the ensemble-code.js file.
This file being code about the spec, we would expect it to be in the meta-spec sub-directory.
|
/**
 * List of events "of interest" that we want test suites to cover.
 */
const GOALS = [
    Actions.wearShirt, (1)
    Actions.eatBanana,
];| 1 | Use the Actions library to define the events. |
The elements in the GOALS array should be an Events or an EventSets. (Recap on the Actions library if needed).
|
Next up, scroll all the way down to the rankingFunction(). This is the main entry point for ranking ensembles.
In this file we can find different options for functions we can use to calculate the rank. We’ll start with the countMetGoals() function, which is the simplest. It ranks test suites by how many events from the GOALS array were met. (You can find the full code in the code-companion directory).
ensemble-code.js file// ... (code starts above) ...
function rankingFunction(ensemble) { (1)
const metGoalsCount = countMetGoals(ensemble); (2)
return metGoalsCount/GOALS.length*100; (3)
}| 1 | The main entry point. Gets a test suite (technically, an array of arrays of Events) and returns a number ranking that suite. The higher the number, the better the suite. |
| 2 | This delegates the work to the above countMetGoals() function which takes your list of goals, checks how many of your goals was reached. The more goals met, the higher the score. It make no difference if a goal was met more then once. |
| 3 | Calculates the percentages by dividing by the number of goals and multiplying by 100. Then returns the rank of the ensemble. |
This is a very simplified version of a ranking function. You can modify it to be as complex or as simple as you want. Deeper dive into ranking functions here.
Running the Ensemble command
Before we run the ENSEMBLE command and see the results the system produces, there are few more things to bare in mind:
-
The system expects a
rankingFunction()to be present in the project. -
The system expects to have a
samples.jsonfile. If it already exists, it uses it to produce the ensemble. Otherwise, it first creates a samples.json file and then runs the ensemble command.
Now, let’s overwrite our previous samples.json file which currently contains only 3 samples, and produce an ensemble of 2 scenarios (as we only have 2 goals this should achieve a rank of 100%).
provengo sample <path-to-project>.
provengo ensemble --size 2 <path-to-project>.
When running ensemble, if no sample file is present, provengo will automatically generate a sample for you, and then run the optimization process.
|
When running the ensemble command, an evolution-based optimization mechanism is activated. This provides the selection of a subgroup that will maximize the value of the ranking function.
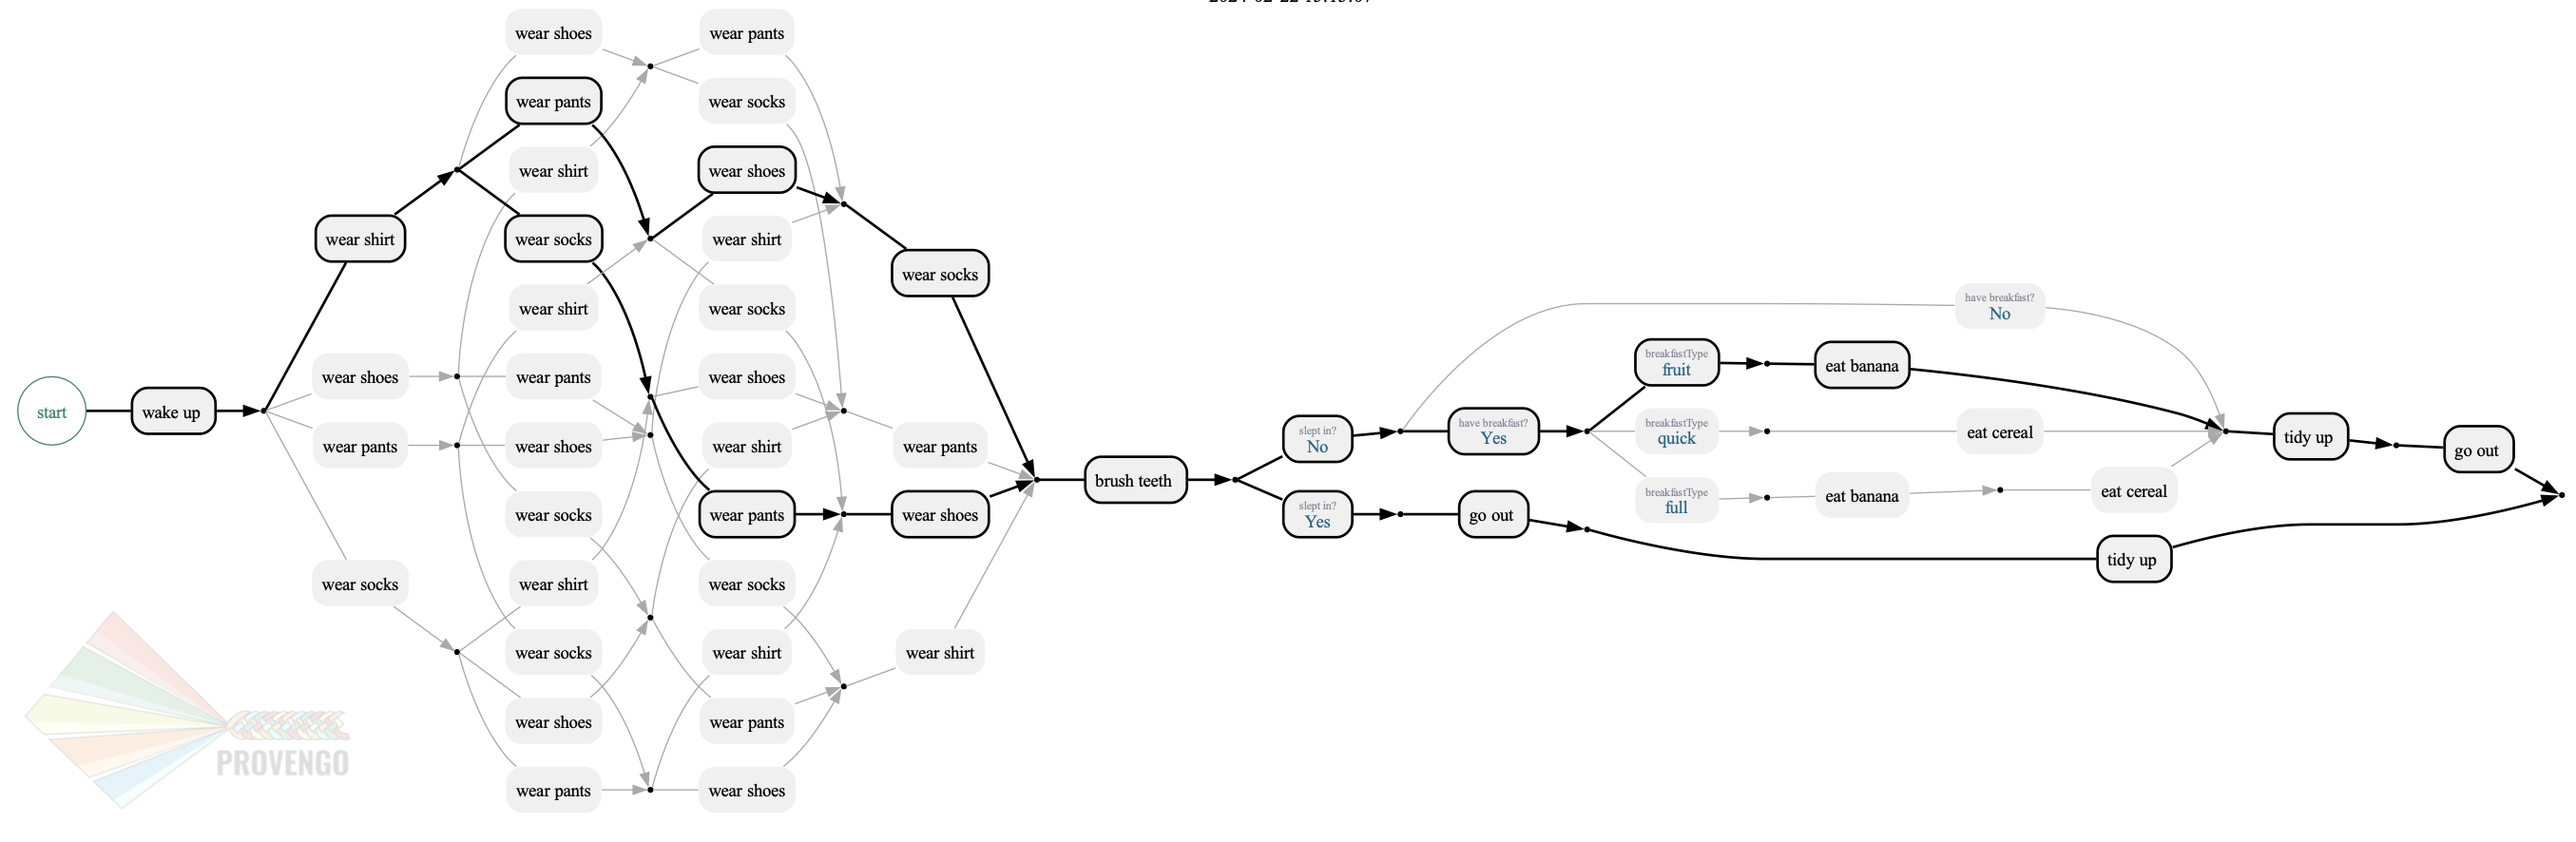
Now run the analyze command to see the highlighted ensemble scenarios.
provengo analyze -f pdf --highlight <path-to-ensemble> <path-to-project>.
You should be able to see the 2 highlighted ensemble scenarios with our goals covered within.
The evolutionary algorithm is just one way of creating test ensembles. Other algorithms are available too - see the ensemble command reference page.
|
Configuration and Profiles
You may have noticed that the console also mentions that the file was overwritten due to the --overwrite flag even though we didn’t use this flag when running the commands. This flag is defined in the configuration file.
Each Provengo project has a configuration file called provengo.yml in its config folder. This is a YAML file, listing configuration keys and their values.
provengo.yml fileversion: 2
sample:
overwrite: true (1)
size: 500
gen-scripts:
overwrite: true
selenium:
implicit-wait: 5000
browser: firefox
visualization:
layout: horizontal (2)
order: visual (3)
profiles: (4)
shirtLater: (5)
ensemble:
ranking-function: shirtLater (6)| 1 | Overwrites the current samples.json file with new samples. |
| 2 | Draws the graph horizontally. The default is vertically. |
| 3 | Determines how graph edges are ordered. The default is lexicographic. Visual gives the best graph view. |
| 4 | Defines various profiles. Read more below. |
| 5 | The profile name. |
| 6 | The rankingFunction to be used. |
Profiles allow users to tweak a project’s settings in order to fit a specific scenario. You can define a profile in the project’s configuration file as shown above. The settings at the top level can be viewed as the project’s default profile (like 1, 2, 3 in the code above). Profiles make it easy for you to keep track on different interests you may have. You don’t need to change the code or the settings of your project every time, but just run the commands with the profile flag.
The full list of keys and their meaning can be found here.
Let’s see how to use the shirtLater profile and how it defers from the default profile.
This profile defines a different ranking function to be used from the ensemble-code.js file.
This time, it ranks test suites by how many steps are performed before the shirt is worn. The more steps, the higher the score.
shirtLater() Ranking Functionfunction shirtLater(ensemble) {
let count = 0;
for ( let route of ensemble ) {
for ( let eventIndex=0; eventIndex<route.length; eventIndex++ ) {
if ( route[eventIndex].name === "wear shirt") {
count+=eventIndex;
}
}
};
return count;
}Let’s find 4 scenarios with the furthest wearShirt Action.
Type provengo --profile shirtLater sample <path-to-project>
And provengo --profile shirtLater ensemble --size 4 <path-to-project>
You should see in your console that the system produced an ensemble with the rank of 16.
This rank is the sum of the number of steps we had before every wearShirt event. (There are 3 possible steps before the wearShirt when dressing up (shoes, socks and pants). We also have the wakeUp step, so it’s 4 all together. Multiply it by the size of the ensemble which is 4, we get the result 16.)
Now draw them using provengo analyze -f pdf --highlight <path-to-ensemble> <path-to-project>.
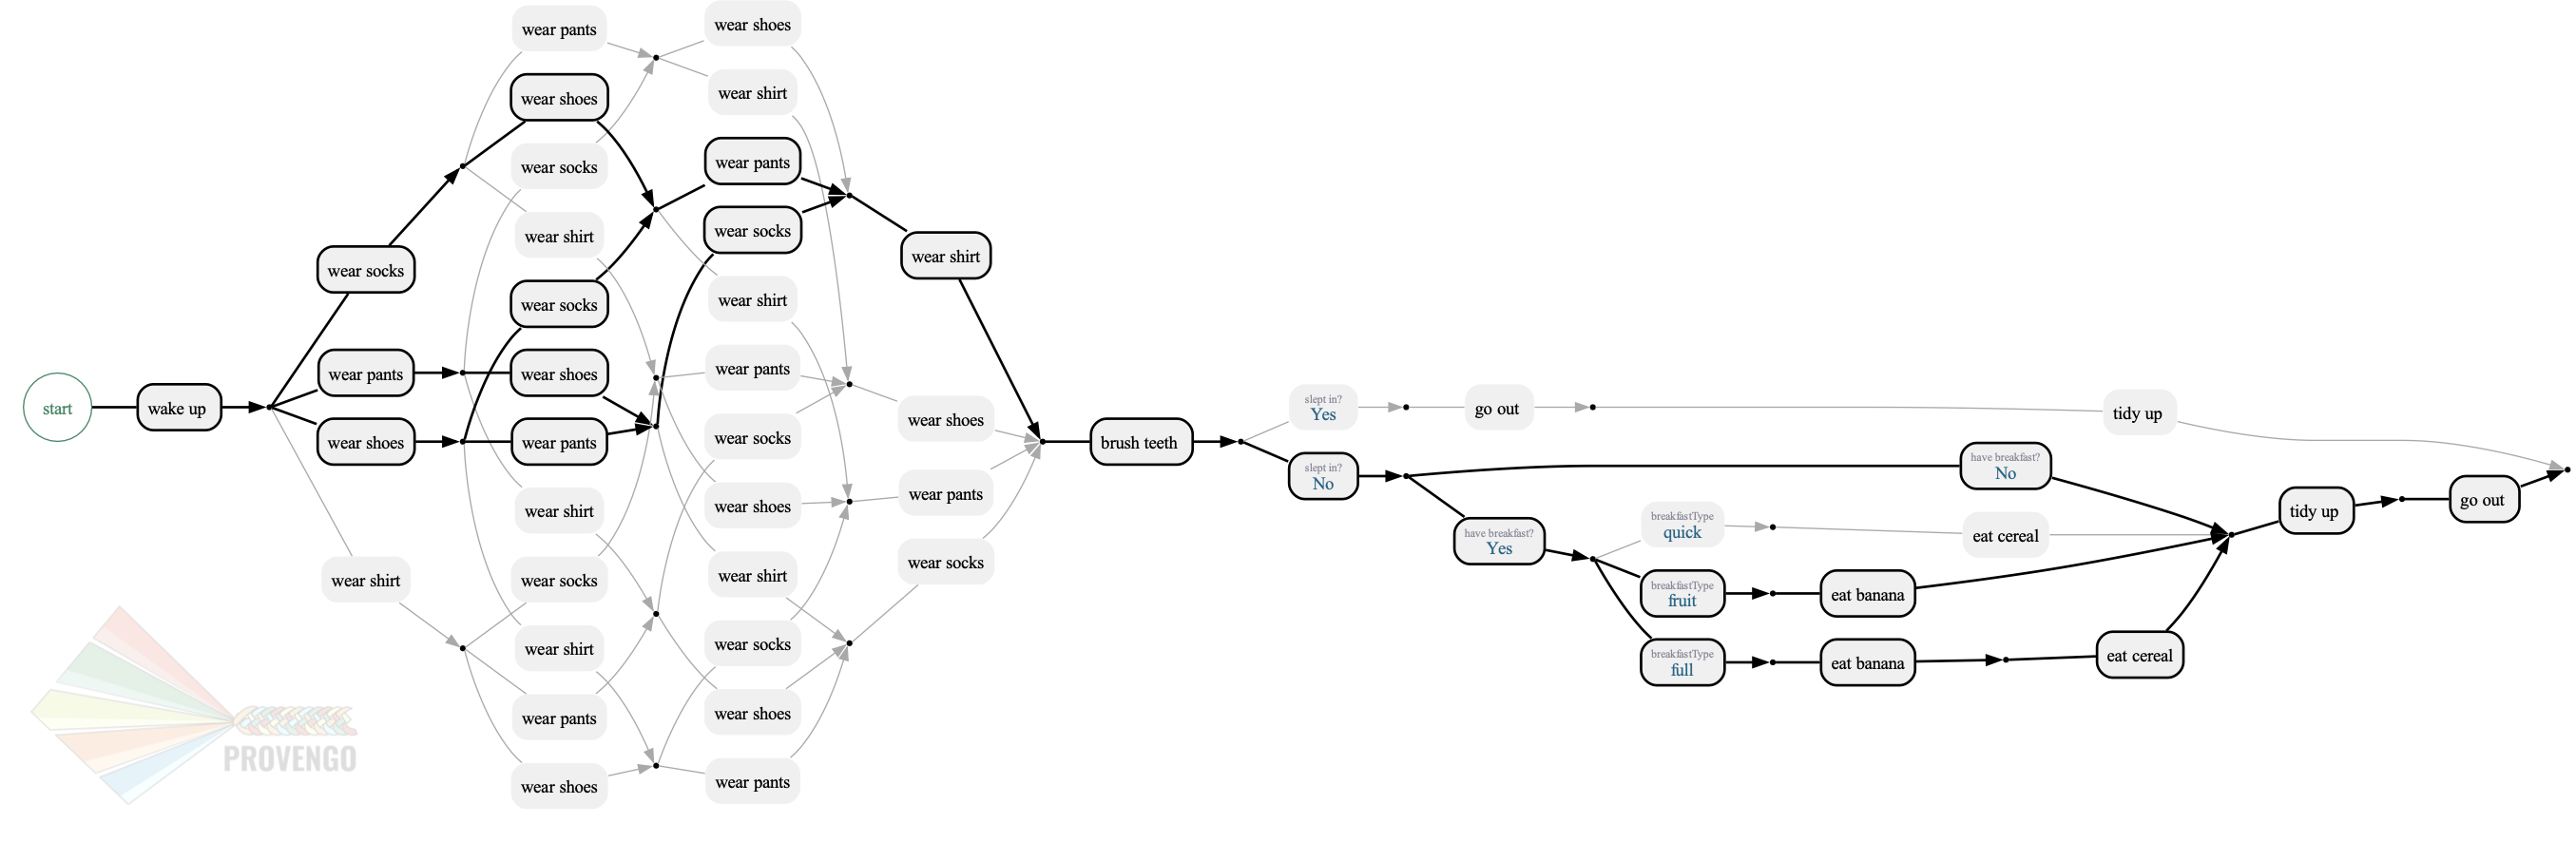
All of the 4 ensemble paths visit the wearShirt event last.
| When running the analyze command it overrides the previous results. if you wish to keep both, you can either rename the existing file or use the -o option to define the new file’s output path. |
Running Test suites
Let’s run our test suite to get see the results using provengo run -s <path-to-ensemble> <path-to-project>.
You should see the path each scenario made together with the results of the test. Each scenario should have the wearShirt event as the last step before brushTeeth. In the last line you get a summary of all the scenarios results.
Running Tests with Automation (Optional)
As promised at the beginning of this tutorial, we will now use the automation layer of the model to make sure the tests really work as expected. Execute the ensemble test suit together with the automation.
Drag the automation file from the disabled sub-folder back to js.
This action changes the model - enriching it with automation data. So, we need to re-sample and re-optimize before running the test. Hard work for the computer, but for us it’s really only 3 commands.
provengo sample --overwrite <path-to-project>
provengo --profile shirtLater ensemble --size 4 <path-to-project>
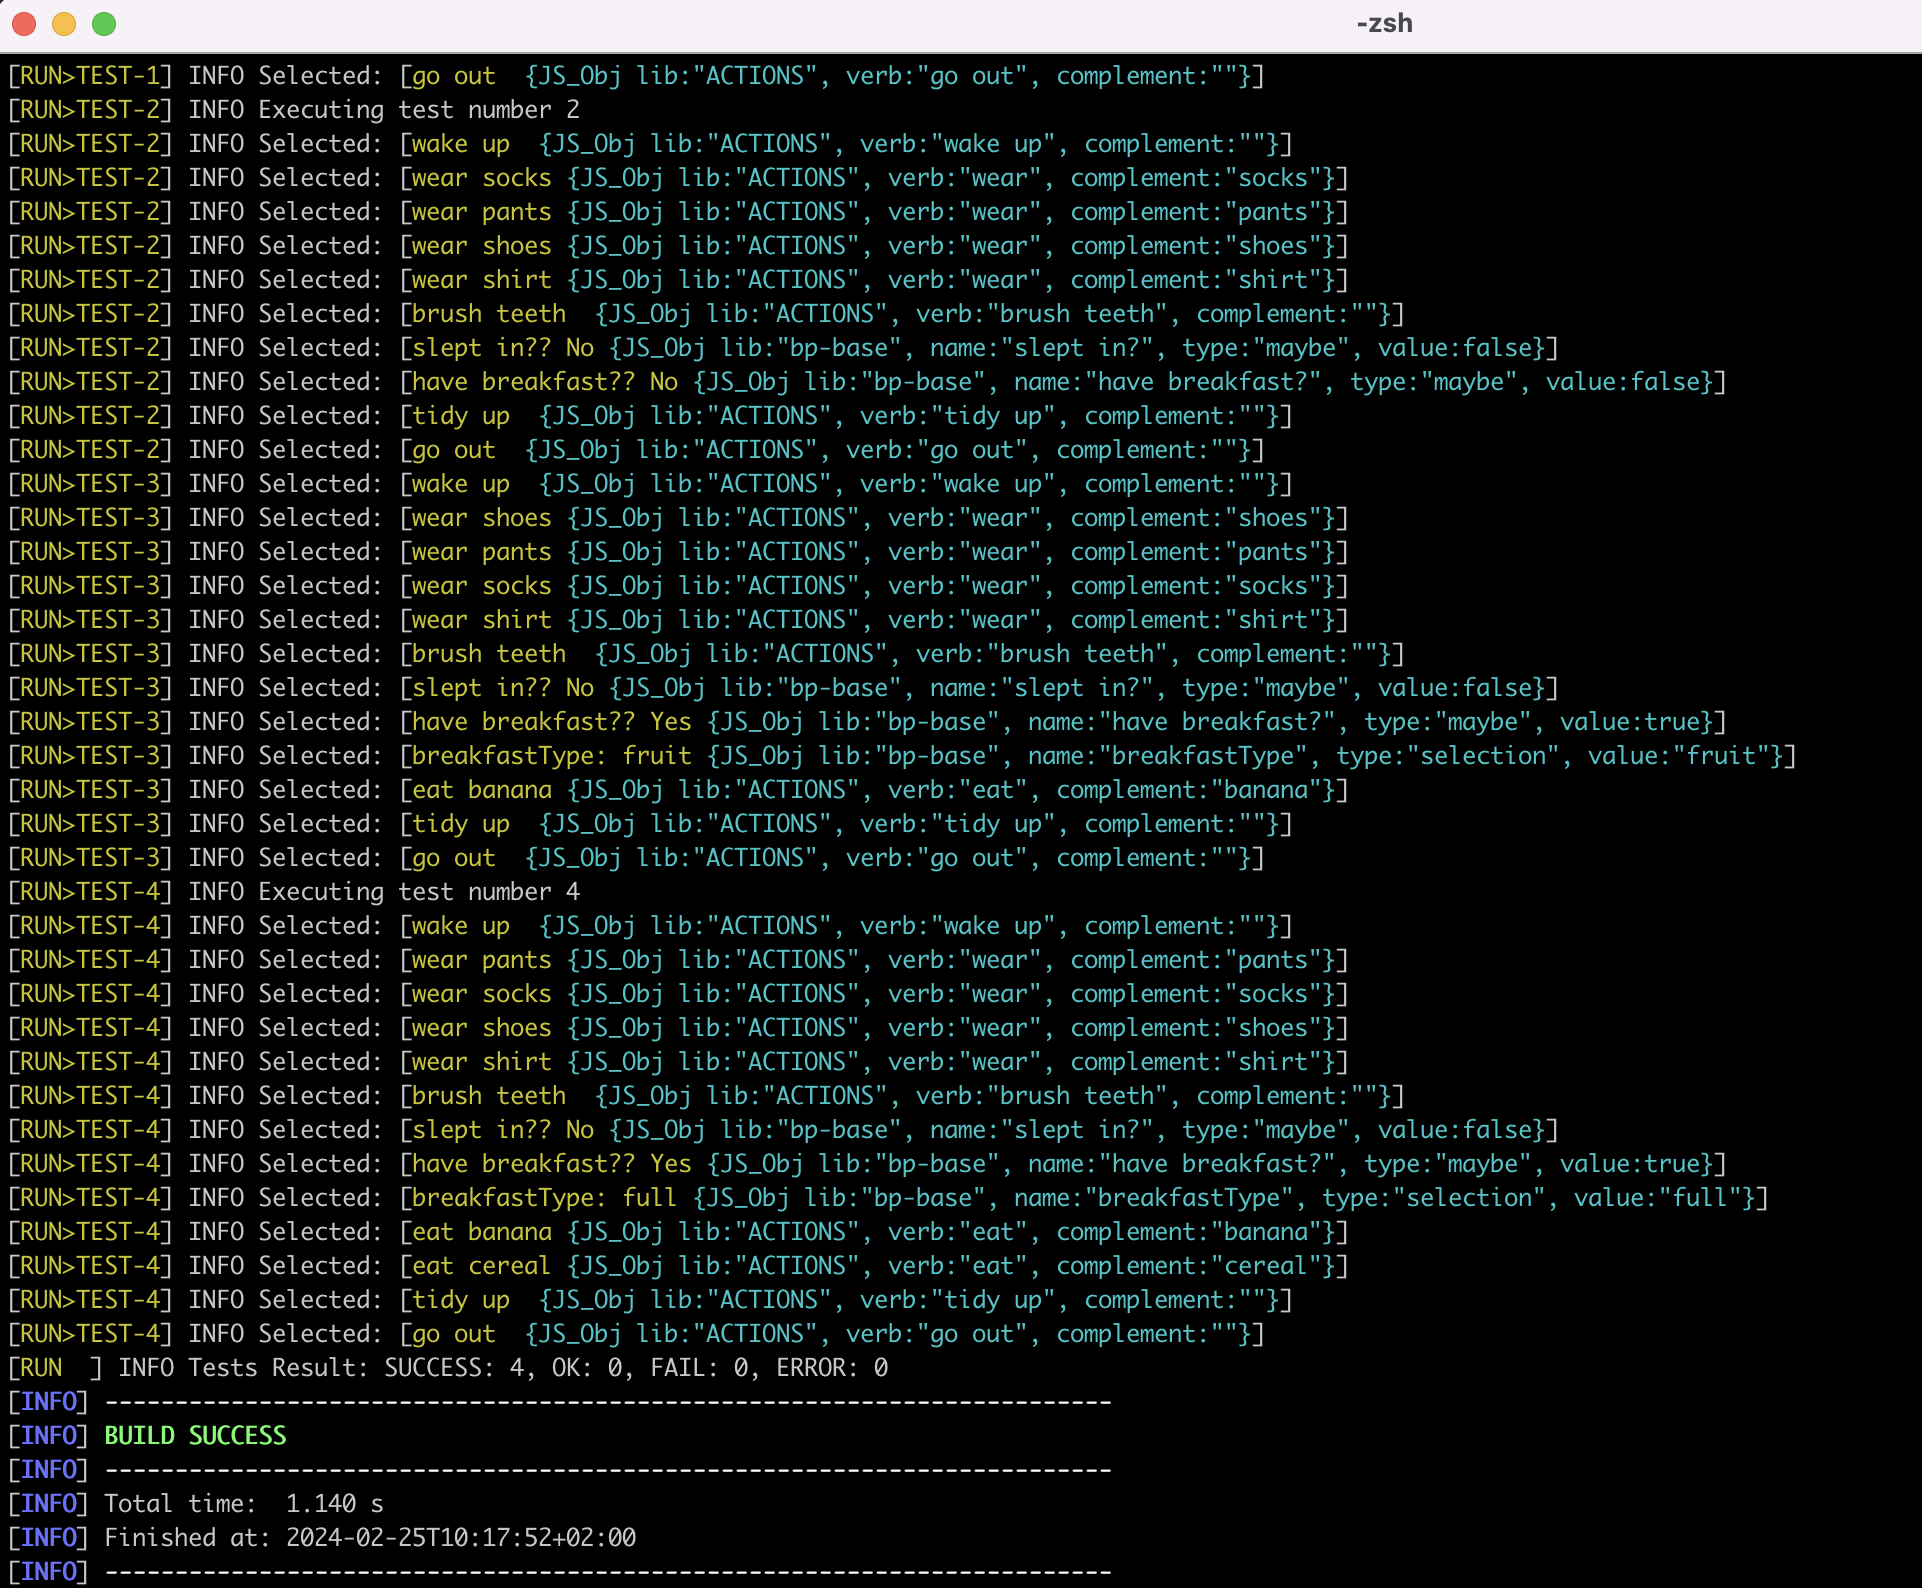
provengo run -s products/run-source/ensemble.json <path-to-project>This executes all the 4 scenarios from the ensemble file. You should see all the scenarios printed to your console, as well as a summary of the results in the last line. If you followed along, you should get:
SUCCESS: 4, OK: 0, FAIL: 0, ERROR: 0
This tutorial was about composing test suites. We went over some basic examples of defining goals and ranking functions. In later tutorials we will see some more complex examples.
Next Steps
Congratulations! In this tutorial you’ve learned about test suites, how to compose them, what are ensembles and how to produce optimized test suites according to your goals. You’ve also learned how to define and run different profiles based on different interests using the project configuration. Next up, we’ll see how to create manual tests.